video
데이터 다운로드
#이미지
!wget -O ./data/rose.jpg \\
         https://thumb.mt.co.kr/06/2020/10/2020101522424982247_3.jpg
#동영상...same
Jupyter 에서 비디오 영상 플레이
from IPython.display import Video
Video('./data/Hanwoo_D03.mp4')
Video('./data/Hanwoo_D03.mp4', width=600, height=300)
비디오 자르기
#!pip install --trusted-host pypi.python.org moviepy
#!pip install imageio-ffmpeg

from moviepy.video.io.ffmpeg_tools import ffmpeg_extract_subclip
ffmpeg_extract_subclip("./data/Hanwoo_D03.mp4",
                       300, 306,
                       targetname="./data/Hanwoo_D03_cut.mp4")  #360
https://abhitronix.github.io/vidgear/v0.2.1-stable/gears/writegear/compression/usage/#using-compression-mode-with-opencv
cv_net = cv2.dnn.readNetFromTensorflow(
    './pretrained/faster_rcnn_resnet50_coco_2018_01_28/frozen_inference_graph.pb',
    './pretrained/config_graph.pbtxt')
import time

def get_detected_img(cv_net, img_array, score_threshold, use_copied_array=True, is_print=True):
    cv_net.setInput(cv2.dnn.blobFromImage(img_array, swapRB=True, crop=False))

    rows = img_array.shape[0]
    cols = img_array.shape[1]

    draw_img = None
    if use_copied_array:
        draw_img = img_array.copy()
    else:
        draw_img = img_array

    start = time.time()
    cv_out = cv_net.forward()
    for detection in cv_out[0,0,:,:]:
        class_id   = int(detection[1])
        score      = float(detection[2])
        if score > score_threshold:
            left   = detection[3] * cols
            top    = detection[4] * rows
            right  = detection[5] * cols
            bottom = detection[6] * rows
            cv2.rectangle(draw_img, (int(left), int(top)), (int(right), int(bottom)),
                          color=(0,255,0), thickness=2) #Green

            caption = "{}: {:.4f}".format(labels_to_names_0[class_id], score)
            cv2.putText(draw_img, caption, (int(left), int(top - 5)),
                        fontFace=cv2.FONT_HERSHEY_SIMPLEX, fontScale=0.4,
                        color=(0,0,255), thickness=1) #Red
            ## print(caption)
    if is_print:
        print('Detection elapsed time:',round(time.time() - start, 2),"Secounds")

    return draw_img
from vidgear.gears import WriteGear
import cv2

def do_detected_video(cv_net, input_path, output_path, score_threshold, is_print):

    stream = cv2.VideoCapture(input_path)
    output_params= {"-vcodec":"libx264", "-crf": 0, "-preset": "fast"}
    writer= WriteGear(output_path, logging=True, **output_params)

    frame_cnt = int(stream.get(cv2.CAP_PROP_FRAME_COUNT))
    print('Total count of Frame:', frame_cnt)

    while True:
        (grabbed, frame) = stream.read()
        if not grabbed:
            print('End of the frame'); break

        img_frame = get_detected_img(cv_net, frame, score_threshold, use_copied_array=False, is_print=is_print)
        writer.write(img_frame)

    cv2.destroyAllWindows()
    stream.release()
    writer.close()
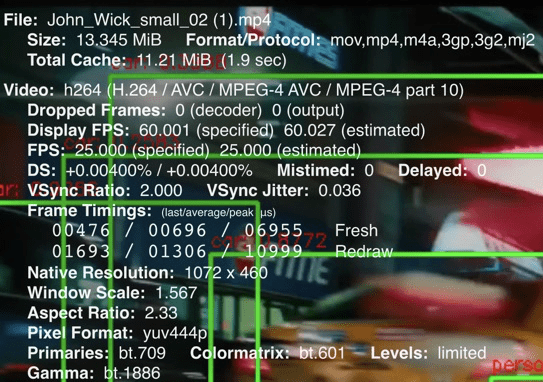
do_detected_video(cv_net, './data/John_Wick_small.mp4', './data/John_Wick_small_02.mp4', 0.5, True)
from IPython.display import Video
Video('./data/John_Wick_small_02.mp4')
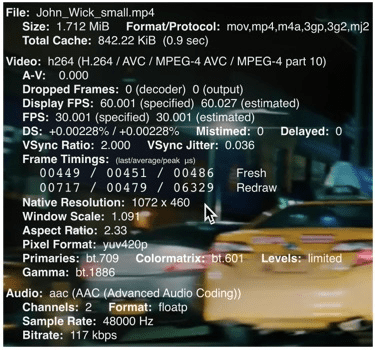
h264/AVC/MPEG-4 AVC/MPEG-4 part 10
H.264 또는 MPEG-4 파트 10, Advanced Video Coding (MPEG-4 AVC)
동영상 녹화, 압축, 배포를 위한 방식들 중 현재 가장 보편적으로 사용되고 있는 포맷
MPEG-4 Visual should not be confused with MPEG-4 Part 10 which is commonly referred to as H.264 or AVC (Advanced Video Coding), and was jointly developed by ITU-T and MPEG.
AVC is currently one of the most commonly used formats for the recording, compression, and distribution of high definition video.
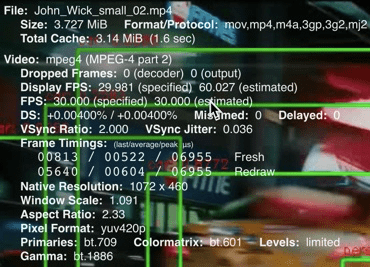
mpeg4 (MPEG-4 part 2)
(=MPEG-4 비주얼(MPEG-4 Visual) 또는 MPEG-4 ASP)
MPEG(ISO/IEC의 동화상 전문가 그룹)에서 만든 디지털 영상 코덱
1999년에 최초로 공개 되었으며, 이후 2001년과 2004년에 개정안이 나왔다.
DivX, Xvid 등이 이 코덱의 구현에 해당한다.
(MPEG-4 Visual) is a video compression technology developed by MPEG, similar to previous standards such as MPEG-1 and MPEG-2 and compatible with H.263. Several popular codecs including DivX and Xvid implement this standard.
이미지 처리
import os
import matplotlib.pyplot as plt
os.chdir('/home/oschung_skcc/my/git/mmdetection')

data_path = os.path.join(os.getcwd(), 'data', 'msc_pilot2')
imgs_path = data_path + '/train_tray/tray_A_1/'
anno_path = data_path + '/annotations/tray_a_1/annotations/'
anno_file = anno_path + 'instances_default.json'
pil
from PIL import Image

# PIL은 oepn()으로 image file을 읽어서 ImageFile객체로 생성.
image = Image.open(imgs_path+'20221006_141538.jpg')
print('image type:', type(image))
scikit Image
from skimage import io

#skimage는 imread()를 이용하여 image를 numpy 배열로 반환함.
image = io.imread(imgs_path+'20221006_141538.jpg')
print(f'image type: {type(image)} image shape: {image.shape}')
opencv
import cv2

# image = cv2.imread(imgs_path+'20221006_141538.jpg')
# image = cv2.cvtColor(image, cv2.COLOR_BGR2RGB)
image = cv2.cvtColor(cv2.imread(imgs_path+'20221006_141538.jpg'), cv2.COLOR_BGR2RGB)

print(f'image type: {type(image)} image shape: {image.shape}')
plt.figure(figsize=(6, 6))
plt.imshow(image)
#plt.show()
Cf.
imgBRG = cv2.imread('./rose.jpg')
imgRGB = cv2.cvtColor(imgBRG, cv2.COLOR_BGR2RGB)
plt.imshow(imgRGB)
