Server간 연결 :: NginX – Rstudio – Shiny
http://www.joinc.co.kr/w/Site/System_management/Proxy
https://support.rstudio.com/hc/en-us/articles/200552326-Running-RStudio-Server-with-a-Proxy
https://support.rstudio.com/hc/en-us/articles/213733868-Running-Shiny-Server-with-a-Proxy
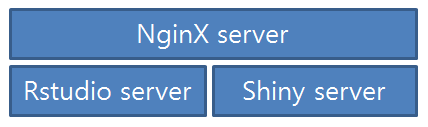
NginX serer는 Rstudio server와 Shiny server의 Proxy server역할을 하여,
각 서버의 결과물을 외부에서 http server (web page)를 통해 접속함.
0. 각 서버 상태 확인
NginX 설정파일 확인
⇒ sudo nginx -t
nginx: the configuration file /etc/nginx/nginx.conf syntax is ok
nginx:     configuration file /etc/nginx/nginx.conf test is successful
RStudio Server 상태확인
⇒ sudo systemctl status rstudio-server
● rstudio-server.service - RStudio Server
   Loaded: loaded (/etc/systemd/system/rstudio-server.service; enabled; vendor preset: enabled)
   Active: active (running) since 목 2017-04-20 23:18:57 KST; 16s ago
  Process: 8763 ExecStop=/usr/bin/killall -TERM rserver (code=exited, status=0/SUCCESS)
  Process: 8808 ExecStart=/usr/lib/rstudio-server/bin/rserver (code=exited, status=0/SUCCESS)
 Main PID: 990 (code=killed, signal=TERM)
   CGroup: /system.slice/rstudio-server.service
           ├─7710 /usr/lib/rstudio-server/bin/rsession -u onesixx
           └─8809 /usr/lib/rstudio-server/bin/rserver
Shiny Server 상태확인
⇒ sudo systemctl status shiny-server
● shiny-server.service - ShinyServer
   Loaded: loaded (/etc/systemd/system/shiny-server.service; enabled; vendor preset: enabled)
   Active: active (running) since 목 2017-04-20 22:43:10 KST; 53min ago
  Process: 842 ExecStartPost=/bin/sleep 3 (code=exited, status=0/SUCCESS)
 Main PID: 845 (shiny-server)
   CGroup: /system.slice/shiny-server.service
           ├─840 /bin/bash -c /opt/shiny-server/bin/shiny-server --pidfile=/var/run/shiny-server.pid >> /var/log/shiny-server.log 2>&1
           └─845 /opt/shiny-server/ext/node/bin/shiny-server /opt/shiny-server/lib/main.js --pidfile=/var/run/shiny-server.pid
⇒  curl -I localhost
HTTP/1.1 200 OK
Server: nginx/1.10.0 (Ubuntu)
Date: Thu, 20 Apr 2017 14:12:18 GMT
Content-Type: text/html
Content-Length: 612
Last-Modified: Tue, 11 Apr 2017 14:43:05 GMT
Connection: keep-alive
ETag: "58eceb79-264"
Accept-Ranges: bytes

⇒  sudo su - -c "R -e \"system('shiny-server --version')\""


⇒  apt-cache showpkg rstudio-server
⇒  apt-cache showpkg shiny-server
상태확인
 4월 20 22:43:07 sixxEOS systemd[1]: Starting ShinyServer...
 4월 20 22:43:10 sixxEOS systemd[1]: shiny-server.service: Supervising process 845 which is not our child. We'll most likely not notice when it exits.
 4월 20 22:43:10 sixxEOS systemd[1]: Started ShinyServer.
 4월 20 23:28:28 sixxEOS su[9854]: Successful su for shiny by root
 4월 20 23:28:28 sixxEOS su[9854]: + ??? root:shiny
 4월 20 23:28:28 sixxEOS su[9854]: pam_unix(su:session): session opened for user shiny by (uid=0)
 4월 20 23:28:28 sixxEOS su[9870]: Successful su for shiny by root
 4월 20 23:28:28 sixxEOS su[9870]: + ??? root:shiny
 4월 20 23:28:28 sixxEOS su[9870]: pam_unix(su:session): session opened for user shiny by (uid=0)
설치방법
- nginx.service – A high performance web server and a reverse proxy server
http://onesixx.com/install-nginx-ubuntu/ - rstudio-server.service – RStudio Server\\\\\\\\\\\\\\\\\\\\
http://onesixx.com/install-rstudio-server-ubuntu/
shiny-server.service – ShinyServer
http://onesixx.com/install-shiny-server-ubuntu/
1. 설정파일 수정
– 모든 서버 shut down
sudo systemctl stop nginx
sudo systemctl stop rstudio-server
sudo systemctl stop shiny-server
– Nginx의 default.conf 수정
sudo vi /etc/nginx/sites-available/default
아래내용 추가
  location /rstudio/ {
    rewrite ^/rstudio/(.*)$ /$1 break;
    proxy_set_header    X-RSC-Request $scheme://$host:$server_port$request_uri;
    proxy_pass http://localhost:8787;
    proxy_redirect / /rstudio/;
    proxy_set_header Upgrade $http_upgrade;
    #proxy_set_header Connection $connection_upgrade;
    proxy_http_version 1.1;
  }

  location /shiny/ {
    rewrite ^/shiny/(.*)$ /$1 break;
    proxy_pass http://localhost:3838;
    proxy_redirect http://localhost:3838/ $scheme://$host/shiny/;
    proxy_http_version 1.1;
    proxy_set_header Upgrade $http_upgrade;
    #proxy_set_header Connection $connection_upgrade;
    proxy_read_timeout 20d;

    auth_basic "Username and Password are required";
    auth_basic_user_file /etc/nginx/.htpasswd;
  }
* shiny아래 auth_basic은 로그인 창을 위한 설정
– RStudio server 의 Configuration 수정
/etc/rstudio/rserver.conf 없으면 만든다.
Proxy 서버역할을 하는 NginX를 통해서만 접근가능하도록 변경. RStudio Server 와 NginX server가 한 머신에서 실행되고 있다면,
RStudior가 0.0.0.0 (all remote clients) 에서 127.0.0.1 (only the localhost)를 Listen할수 있도록 port를 변경한다.
www-address=127.0.0.1
– Shiny server 의 Configuration 수정
/etc/shiny-server/shiny-server.conf
Proxy 서버역할을 하는 NginX를 통해서만 접근가능하도록 변경.
listen 3838 127.0.0.1
5. 서비스 시작
Restart Service
sudo systemctl start rstudio-server
sudo systemctl start shiny-server
sudo systemctl start nginx
6. 확인
xxx.xxx.xxx.xxx:8787 이나 localhost:3838 로는 접속이 안되고, host_ip/rstudio나 host_ip/shiny로만 접속된다.
##
# You should look at the following URL's in order to grasp a solid understanding
# of Nginx configuration files in order to fully unleash the power of Nginx.
# http://wiki.nginx.org/Pitfalls
# http://wiki.nginx.org/QuickStart
# http://wiki.nginx.org/Configuration
#
# Generally, you will want to move this file somewhere, and start with a clean
# file but keep this around for reference. Or just disable in sites-enabled.
#
# Please see /usr/share/doc/nginx-doc/examples/ for more detailed examples.
##

# Default server configuration
#
server {
  listen 80 default_server;
  listen [::]:80 default_server;

  # SSL configuration
  #
  # listen 443 ssl default_server;
  # listen [::]:443 ssl default_server;
  #
  # Note: You should disable gzip for SSL traffic.
  # See: https://bugs.debian.org/773332
  #
  # Read up on ssl_ciphers to ensure a secure configuration.
  # See: https://bugs.debian.org/765782
  #
  # Self signed certs generated by the ssl-cert package
  # Don't use them in a production server!
  #
  # include snippets/snakeoil.conf;

  root /var/www/html;

  # Add index.php to the list if you are using PHP
  index index.html index.htm index.nginx-debian.html;

  server_name _;

  location / {
    # First attempt to serve request as file, then
    # as directory, then fall back to displaying a 404.
    try_files $uri $uri/ =404;
  }

  location /rstudio/ {
    rewrite ^/rstudio/(.*)$ /$1 break;
    proxy_pass http://localhost:8787;
    proxy_redirect http://localhost:8787/ $scheme://$host/rstudio/;
    #proxy_redirect / /rstudio/;
    proxy_http_version 1.1;
    proxy_set_header Upgrade $http_upgrade;
    #proxy_set_header X-RSC-Request $scheme://$host:$server_port$request_uri;
    #proxy_set_header Connection $connection_upgrade;
    proxy_read_timeout 20d;
  }

  location /shiny/ {
    rewrite ^/shiny/(.*)$ /$1 break;
    proxy_pass http://localhost:3838;
    proxy_redirect http://localhost:3838/ $scheme://$host/shiny/;
    proxy_http_version 1.1;
    proxy_set_header Upgrade $http_upgrade;
    #proxy_set_header Connection $connection_upgrade;
    proxy_read_timeout 20d;

    auth_basic "Username and Password are required";
    auth_basic_user_file /etc/nginx/.htpasswd;
  }

  # pass the PHP scripts to FastCGI server listening on 127.0.0.1:9000
  #
  #location ~ \.php$ {
  # include snippets/fastcgi-php.conf;
  #
  # # With php7.0-cgi alone:
  # fastcgi_pass 127.0.0.1:9000;
  # # With php7.0-fpm:
  # fastcgi_pass unix:/run/php/php7.0-fpm.sock;
  #}

  # deny access to .htaccess files, if Apache's document root
  # concurs with nginx's one
  #
  #location ~ /\.ht {
  # deny all;
  #}
}


# Virtual Host configuration for example.com
#
# You can move that to a different file under sites-available/ and symlink that
# to sites-enabled/ to enable it.
#
#server {
# listen 80;
# listen [::]:80;
#
# server_name example.com;
#
# root /var/www/example.com;
# index index.html;
#
# location / {
#   try_files $uri $uri/ =404;
# }
#}
접근가능한 폴더 추가
위 default파일에서 서버 Root는 아래와 같고,
root /var/www/html;
해당 폴더에 링크를 추가하여, 원하는 폴더를 추가한다.
sudo ln -s /Users/onesixx/Dropbox/RHome/lecture /var/www/html/lecture
결과 확인
⇒ pwd
/var/www/html
⇒ ll
-rw-r--r-- 1 root root 612  4월 17 16:30 index.nginx-debian.html
lrwxrwxrwx 1 root root  37  4월 20 09:28 lecture -> /Users/onesixx/Dropbox/RHome/lecture
lrwxrwxrwx 1 root root  29  5월  4 16:34 rhome -> /Users/onesixx/Dropbox/RHome
