install NginX :: Ubuntu
https://github.com/Homebrew/homebrew-nginx
https://homebrew-nginx.marcqualie.com/
http://www.shako.net/blog/installing-lemp-stack-on-os-x-10-11/
RStudio-server(8787)나 Shiny Server(3838)은 WebApplication.
NGinX(80)을 통해 WebPage생성하여 Http server
Nginx 설치
$ sudo apt update && sudo apt upgrade
$ sudo apt install nginx
설치확인
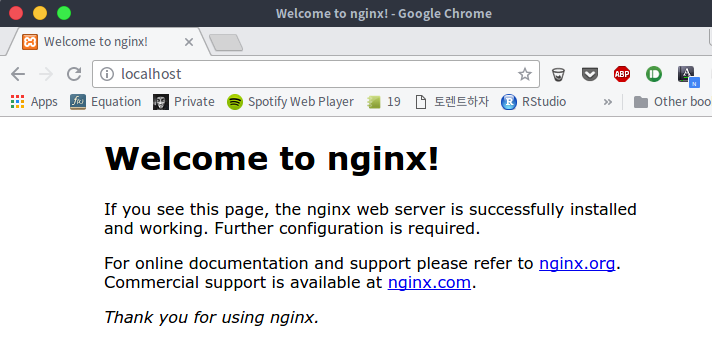
바로 브라우저를 통해 확인 가능. http://localhost
grep nginx
curl http://localhost
sudo netstat ntlp
외부접근은 firewall설정
디렉토리
설치 디렉토리
/etc/nginx
➜ ls -al /etc/nginx
total 72
drwxr-xr-x   6 root root  4096  4월 17 16:30 .
drwxr-xr-x 152 root root 12288  4월 17 16:30 ..
drwxr-xr-x   2 root root  4096 10월 28 00:34 conf.d
-rw-r--r--   1 root root  1077  4월 26  2016 fastcgi.conf
-rw-r--r--   1 root root  1007  4월 26  2016 fastcgi_params
-rw-r--r--   1 root root  2837  4월 26  2016 koi-utf
-rw-r--r--   1 root root  2223  4월 26  2016 koi-win
-rw-r--r--   1 root root  3957  4월 26  2016 mime.types
-rw-r--r--   1 root root  1462  4월 26  2016 nginx.conf
-rw-r--r--   1 root root   180  4월 26  2016 proxy_params
-rw-r--r--   1 root root   636  4월 26  2016 scgi_params
drwxr-xr-x   2 root root  4096  4월 17 16:30 sites-available
drwxr-xr-x   2 root root  4096  4월 17 16:30 sites-enabled
drwxr-xr-x   2 root root  4096  4월 17 16:30 snippets
-rw-r--r--   1 root root   664  4월 26  2016 uwsgi_params
-rw-r--r--   1 root root  3071  4월 26  2016 win-utf
Config 디렉토리
/etc/nginx/nginx.conf
/etc/nginx/sites-available/default
설정 파일
- 글로벌 설정 : nginx.conf
#
user www-data;
worker_processes auto;
pid /run/nginx.pid;

events {
	worker_connections 768;
	# multi_accept on;
}

http {
	map $http_upgrade $connection_upgrade {
	    default upgrade;
	    ''      close;
	}
	##
	# Basic Settings
	##
	sendfile on;
	tcp_nopush on;
	tcp_nodelay on;
	keepalive_timeout 65;
	types_hash_max_size 2048;
	# server_tokens off;
	client_max_body_size 200M;
	# server_names_hash_bucket_size 64;
	# server_name_in_redirect off;

	include /etc/nginx/mime.types;
	default_type application/octet-stream;

	##
	# SSL Settings
	##
	ssl_protocols TLSv1 TLSv1.1 TLSv1.2; # Dropping SSLv3, ref: POODLE
	ssl_prefer_server_ciphers on;

	##
	# Logging Settings
	##
	access_log /var/log/nginx/access.log;
	error_log /var/log/nginx/error.log;

	##
	# Gzip Settings
	##
	gzip on;
	gzip_disable "msie6";
	# gzip_vary on;
	# gzip_proxied any;
	# gzip_comp_level 6;
	# gzip_buffers 16 8k;
	# gzip_http_version 1.1;
	# gzip_types text/plain text/css application/json application/javascript text/xml application/xml application/xml+rss text/javascript;

	##
	# Virtual Host Configs
	##
	include /etc/nginx/conf.d/*.conf;
	include /etc/nginx/sites-enabled/*;
}

#mail {
#	# See sample authentication script at:
#	# http://wiki.nginx.org/ImapAuthenticateWithApachePhpScript
#
#	# auth_http localhost/auth.php;
#	# pop3_capabilities "TOP" "USER";
#	# imap_capabilities "IMAP4rev1" "UIDPLUS";
#
#	server {
#		listen     localhost:110;
#		protocol   pop3;
#		proxy      on;
#	}
#
#	server {
#		listen     localhost:143;
#		protocol   imap;
#		proxy      on;
#	}
#}
fastcgi.conf,
include /etc/nginx/sites-enabled/*;
- 서버설정:
물리적인 파일 – sites-available폴더에 default (/etc/nginx/sites-available/default)
enable하고 싶은 파일만 symbolic link 함. (/etc/nginx/sites-enable/default -> /etc/nginx/sites-available/default)
##
# You should look at the following URL's in order to grasp a solid understanding
# of Nginx configuration files in order to fully unleash the power of Nginx.
# http://wiki.nginx.org/Pitfalls
# http://wiki.nginx.org/QuickStart
# http://wiki.nginx.org/Configuration
#
# Generally, you will want to move this file somewhere, and start with a clean
# file but keep this around for reference. Or just disable in sites-enabled.
#
# Please see /usr/share/doc/nginx-doc/examples/ for more detailed examples.
##

# Default server configuration
#
server {
        listen 80 default_server;
        listen [::]:80 default_server;

        # SSL configuration
        #
        # listen 443 ssl default_server;
        # listen [::]:443 ssl default_server;
        #
        # Note: You should disable gzip for SSL traffic.
        # See: https://bugs.debian.org/773332
        #
        # Read up on ssl_ciphers to ensure a secure configuration.
        # See: https://bugs.debian.org/765782
        #
        #
        # Self signed certs generated by the ssl-cert package
        # Don't use them in a production server!
        #
        # include snippets/snakeoil.conf;

        root /var/www/html;

        # Add index.php to the list if you are using PHP
        index index.html index.htm index.nginx-debian.html;

        server_name _;

        location / {
                # First attempt to serve request as file, then
                # as directory, then fall back to displaying a 404.
                try_files $uri $uri/ =404;
        }

        # pass the PHP scripts to FastCGI server listening on 127.0.0.1:9000
        #
        #location ~ \.php$ {
        #       include snippets/fastcgi-php.conf;
        #
        #       # With php7.0-cgi alone:
        #       fastcgi_pass 127.0.0.1:9000;
        #       # With php7.0-fpm:
        #       fastcgi_pass unix:/run/php/php7.0-fpm.sock;
        #}
        # deny access to .htaccess files, if Apache's document root
        # concurs with nginx's one
        #
        #location ~ /\.ht {
        #       deny all;
        #}
}

# Virtual Host configuration for example.com
#
# You can move that to a different file under sites-available/ and symlink that
# to sites-enabled/ to enable it.
#
#server {
#       listen 80;
#       listen [::]:80;
#
#       server_name example.com;
#
#       root /var/www/example.com;
#       index index.html;
#
#       location / {
#               try_files $uri $uri/ =404;
#       }
#}
기본 Document Root
/var/www/html
ex)/var/www/html/index.nginx-debian.html
Nginx 간단 명령어
- 서버 시작 : $ nginx
- 서버 종료 : $ nginx -s stop
- 서버 재시작 : $ nginx -s reload
sudo service nginx stop
sudo service nginx start
sudo service nginx status
sudo systemctl stop nginx
⇒  sudo nginx -h
nginx version: nginx/1.10.0 (Ubuntu)
Usage: nginx [-?hvVtTq] [-s signal] [-c filename] [-p prefix] [-g directives]

Options:
  -?,-h         : this help
  -v            : show version and exit
  -V            : show version and configure options then exit
  -t            : test configuration and exit
  -T            : test configuration, dump it and exit
  -q            : suppress non-error messages during configuration testing
  -s signal     : send signal to a master process: stop, quit, reopen, reload
  -p prefix     : set prefix path (default: /usr/share/nginx/)
  -c filename   : set configuration file (default: /etc/nginx/nginx.conf)
  -g directives : set global directives out of configuration file
Error 처리
log permission
⇒  nginx -s reload
nginx: [alert] could not open error log file: open() "/var/log/nginx/error.log" failed (13: Permission denied)
2017/05/12 01:00:13 [warn] 15923#15923: the "user" directive makes sense only if the master process runs with super-user privileges, ignored in /etc/nginx/nginx.conf:1
2017/05/12 01:00:13 [notice] 15923#15923: signal process started
2017/05/12 01:00:13 [alert] 15923#15923: kill(1390, 1) failed (1: Operation not permitted)
⇒ sudo nginx -t
nginx: the configuration file /etc/nginx/nginx.conf syntax is ok
nginx: configuration file /etc/nginx/nginx.conf test is successful
⇒ sudo chmod -R 755 /var/log/nginx
Setting up Automatic Updates on Your Server
https://www.r-bloggers.com/deploying-your-very-own-shiny-server/
⇒ vi /etc/apt/apt.conf.d/50unattended-upgrades
…<작성중>
Unattended-Upgrade::Allowed-Origins {
   "${distro_id}:${distro_codename}-security";
   "${distro_id}:${distro_codename}-updates";
};
Unattended-Upgrade::Mail "[email protected]";
Unattended-Upgrade::Remove-Unused-Dependencies "true";
Unattended-Upgrade::Automatic-Reboot "true";
Unattended-Upgrade::Automatic-Reboot-Time "02:00";
vi /etc/apt/apt.conf.d/10periodic
Reverse Proxy
https://www.nginx.com/resources/admin-guide/reverse-proxy/
https://www.youtube.com/watch?v=Dgf9uBDX0-g – by Zariga Tongy

Local Device client User -> Public Internet -> Reverse Proxy -> Origin Web Server IP
Client를 대신해서 목적서버의 network resource를 request하는 proxy server
- client side의 설정이 전혀 필요없다.
- Network request를 투명하게 처리할수 있다.
- Security를 위한 하나의 Layer를 얻을 수 있다.
- load balancing이 가능하다.
cf. Forward Proxy : Local Device client User -> Proxy -> Public Internet
https://www.techandme.se/set-up-nginx-reverse-proxy/
(Optional) Serving to a custom domain with clean URLs (no :3838 links)
Now we have shiny installed and configured properly.
You’ll still need to set it up to serve the files to your actual website address however. I updated my nginx configuration (/etc/nginx/sites-enabled/default or /etc/nginx/sites-enabled/) to add a block for shiny. This allows you to host on yoursite/shiny. This is a reverse proxy and allows you to get around porting issues
location /shiny/ {
    proxy_pass http://127.0.0.1:3838/;
        proxy_http_version 1.1;
        proxy_set_header Upgrade $http_upgrade;
        proxy_set_header Connection "upgrade";
}
