entware 설치
https://gameseven.tistory.com/614
https://allaboutmoon.tistory.com/125
https://blog.naver.com/frogx/130082093719
USB 디스크 ext2/ext3/ext4 중 하나로 포맷해서 꽂고
처음에 putty 접속 후
amtm 입력, 테마 고르고
onesixx@RT-USB:/tmp/home/root# amtm
_____________________________________________

 Select a theme that works best in your
 SSH client. All colors in use are shown.

 1. standard       standard        standard
    standard       standard        standard
_____________________________________________

 2. green          green           green
    green          green           green
_____________________________________________

 3. blue           blue            blue
    blue           blue            blue
_____________________________________________

 4. blue_on_white  blue_on_white   blue_on_wh
    blue_on_white  blue_on_white   blue_on_wh
_____________________________________________

 5. solarized      solarized       solarized
    solarized      solarized       solarized
_____________________________________________

 6. high_contrast  high_contrast   high_contr
    high_contrast  high_contrast   high_contr
_____________________________________________

 7. reduced        reduced         reduced
    reduced        reduced         reduced
_____________________________________________

 8. reduced_w      reduced_w       reduced_w
    reduced_w      reduced_w       reduced_w
_____________________________________________

 9. reduced_cw     reduced_cw      reduced_cw
    reduced_cw     reduced_cw      reduced_cw
_____________________________________________

10. reduced_b      reduced_b       reduced_b
    reduced_b      reduced_b       reduced_b
_____________________________________________

11. reduced_cb     reduced_cb      reduced_cb
    reduced_cb     reduced_cb      reduced_cb
_____________________________________________

12. basic          basic
_____________________________________________

 The basic and reduced themes use no or fewer
 colors, service states may not be visible.

 Select amtm theme: [1-12] 1
_____________________________________________
amtm
i
터미널 메뉴 뜨면 ep 입력해서 entware 설치
ep
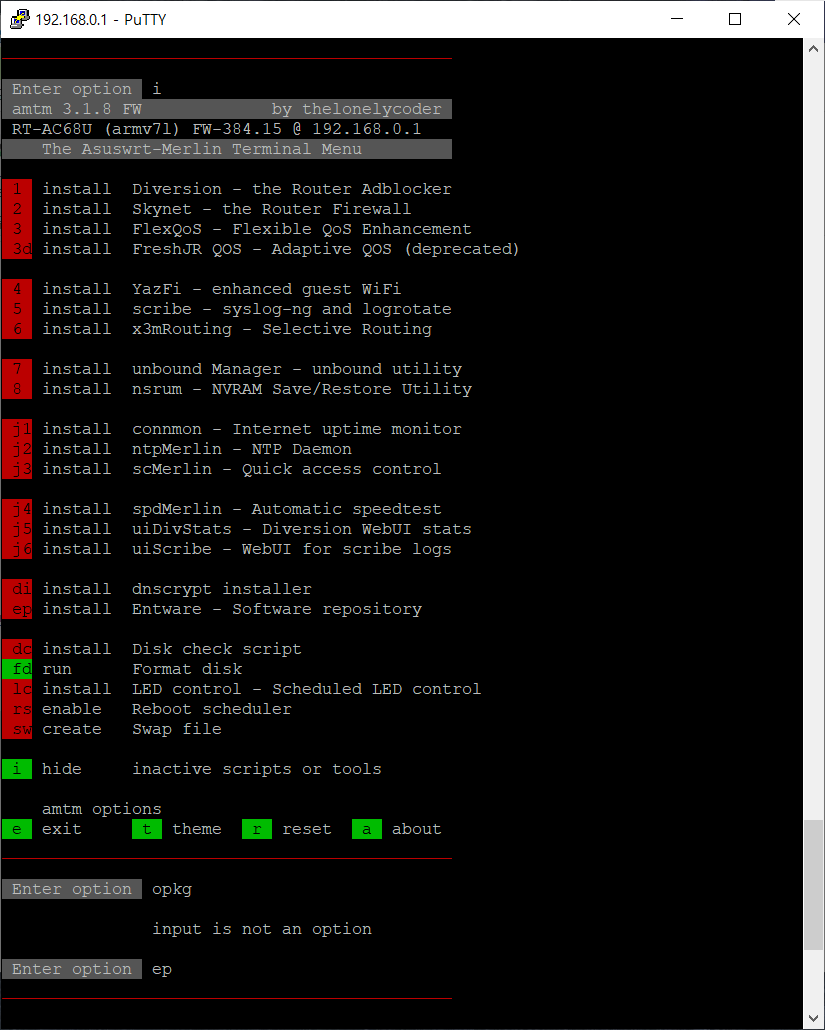
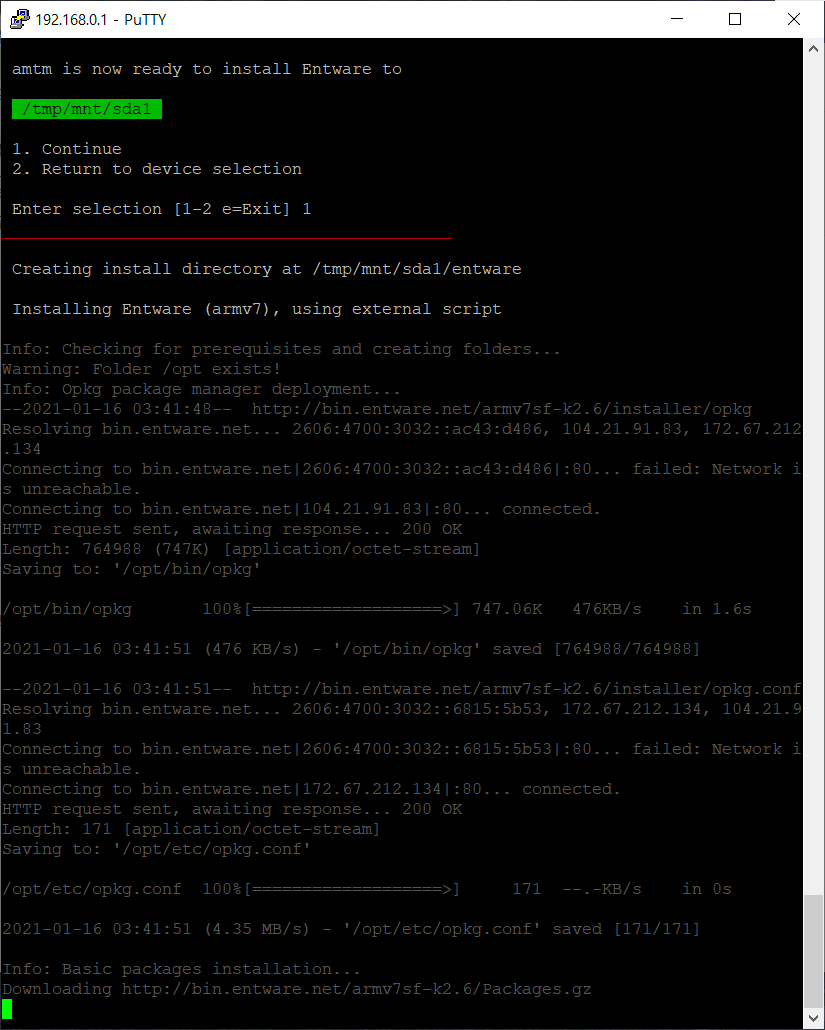
연결된 USB 디스크(sda1) 뜨고 거기다가 설치
잠시 기다리자
설치가 끝나면 CLI 화면이 정리되고 터미널 메뉴가 뜬다
ep 입력 – 2 입력
ep //들어가서
2 //입력
엔트웨어 패키지를 확인해보자
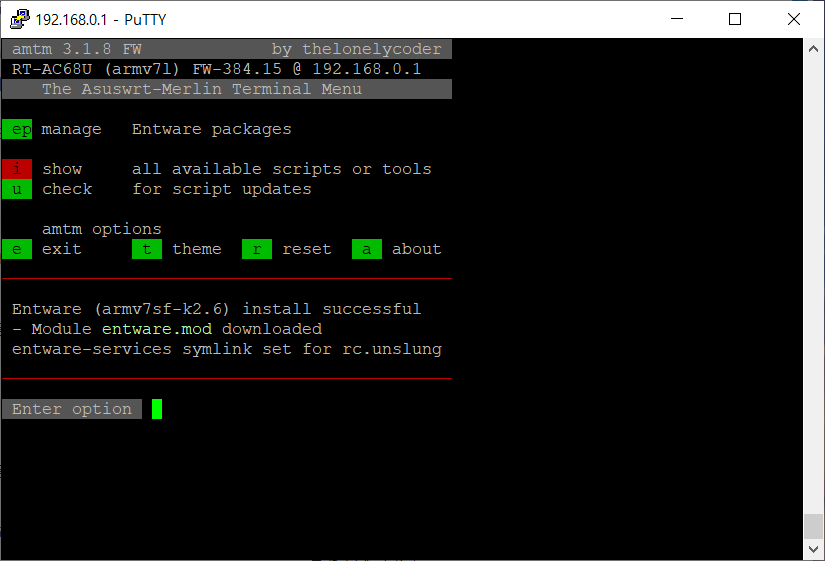
설치된 entware 패키지에 opkg가 보인다

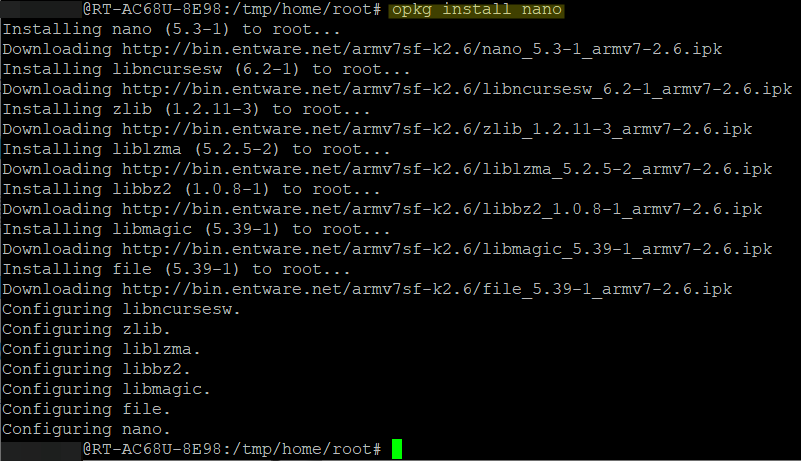
2. nano 에디터 설치
amtm을 종료하고 다시 쉘로 돌아온다
이제 opkg하면 커맨드가 먹힌다
opkg install nano 입력해서 설치하자
opkg install nano
여기까지가 멀린펌 링크에서 초기 설정이 끝났다 ㅋㅋ
엔트웨어 설치, 나노 에디터 설치
Transmission 설치
설치부분부터 따라하면 된다
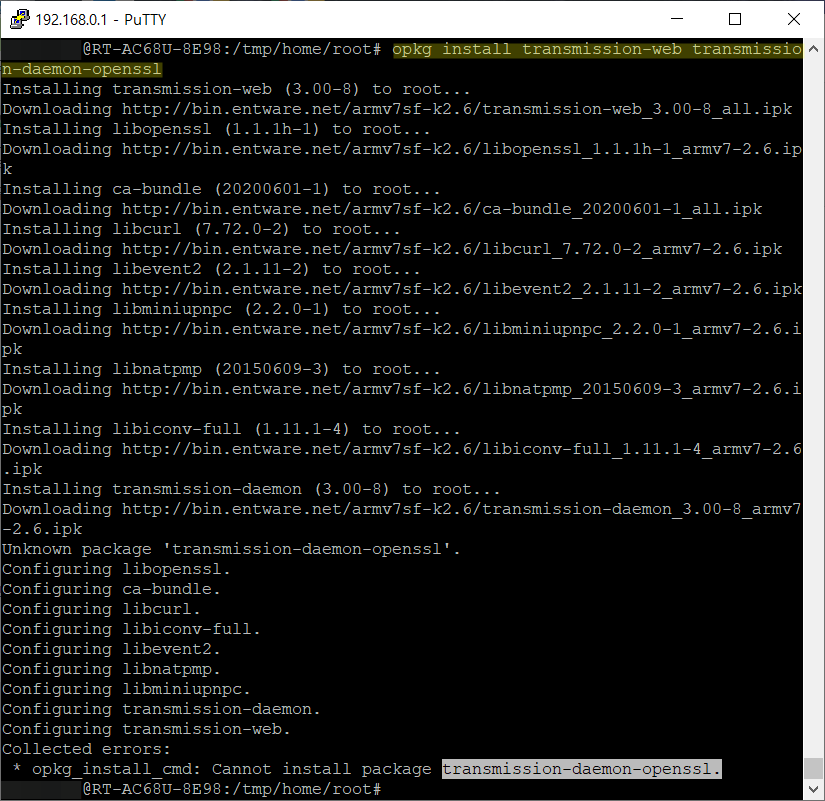
opkg install transmission-web transmission-daemon-openssl
opkg install transmission-web transmission-daemon-openssl
그런데 설치 잘하다가 openssl은 없다고?
위키 설명대로 했는데 왜 없지…
mkdir /mnt/sda1/Torrent/
mkdir /mnt/sda1/Torrent/
대충 이런 식으로 폴더 만들어주고…

아직 세팅 덜 끝났는데 트랜스미션 돌아가고 있으니까 죽이자
/opt/etc/init.d/S88Transmission stop
/opt/etc/init.d/S88Transmission stop
그리고 nano 에디터 켜서 설정 변경
nano -w /opt/etc/transmission/settings.json
nano -w /opt/etc/transmission/settings.json

아 젠장 s 빠트렸네 ㅋㅋ
왜 새 파일 생성하냐했네
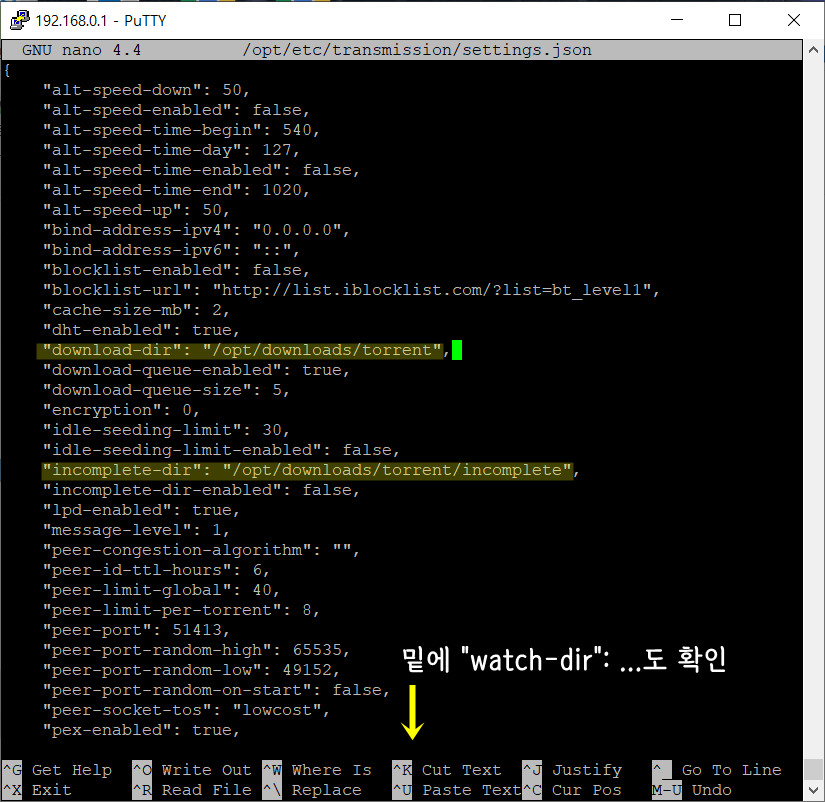
나노 에디터에서 수정해줄 것은
폴더 세 개 경로를 바꿔주는 것이다
download-dir, watch-dir, incomplete-dir
“download-dir”: “/mnt/sda1/Torrent/Completed”,
“incomplete-dir”: “/mnt/sda1/Torrent/Incomplete”,
“watch-dir”: “/mnt/sda1/Torrent/Watch”,
추가로 암호도 걸어두는 걸 추천한다
“rpc-authentication-required”: true,
“rpc-username”: “admin”,
“rpc-password”: “yourpassword”,
*유저네임과 패스워드는 임의값이므로 실제로는 본인이 사용할 값을 입력*
암호는 트랜스미션 처음 실행하면 해시되서 안전하다고 함
지금은 평문으로 보이지만
방화벽 설정
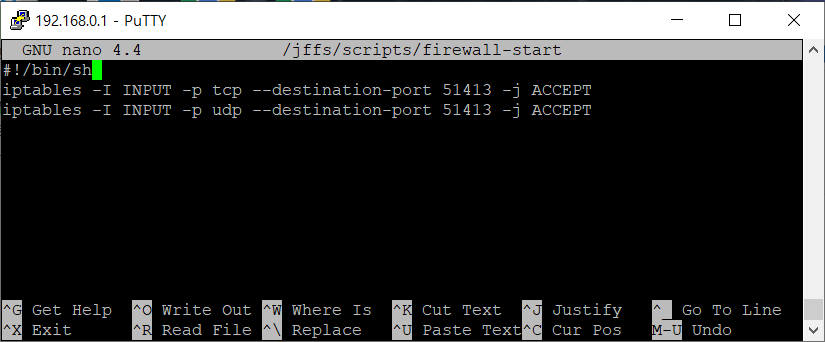
나노 에디터로 새 파일을 만들자
nano -w /jffs/scripts/firewall-start
nano -w /jffs/scripts/firewall-start
아래 내용을 입력하자
이미 있다면 그 파일 맨 위에 추가하면 된다
#!/bin/sh
iptables -I INPUT -p tcp –destination-port 51413 -j ACCEPT
iptables -I INPUT -p udp –destination-port 51413 -j ACCEPT
#!/bin/sh
iptables -I INPUT -p tcp --destination-port 51413 -j ACCEPT
iptables -I INPUT -p udp --destination-port 51413 -j ACCEPT
그리고 실행가능하게 바꾸자
chmod a+rx /jffs/scripts/firewall-start
chmod a+rx /jffs/scripts/firewall-start
이제 모든 설정이 끝났다
바로 켜보자
/jffs/scripts/firewall-start
/opt/etc/init.d/S88Transmission start
/jffs/scripts/firewall-start /opt/etc/init.d/S88Transmission start

Transmission 사용
접속방법은 이렇다
내부망에서 접속 시
– 공유기 접속 사설ip:9091 또는 (예: 192.168.0.1:9091)
– router.asus.com:9091/transmission 또는 (공용)
– [DDNS]:9091 (DDNS 설정 필요)
이 3가지 방법으로 접속할 수 있다
외부에서는 DDNS로 접속하면 되는데 포트 포워딩 설정을 해줘야 한다
공유기 사설 ip:9091로 접속해보겠다
접속 계정은 아까 설정했던 아이디와 패스워드를 입력하면 된다

접속해서 Open 누르면
이런 식으로 뜬다
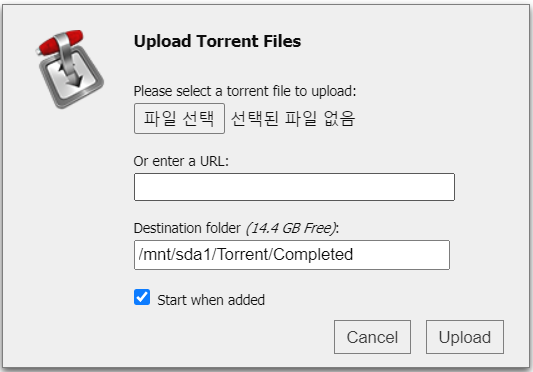
토렌트 파일을 열어도 되고
아니면 URL을 입력해도 된다 (마그넷 링크 복붙)
그리고 목적지 폴더 옆에 현재 연결된 저장장치의 잔여공간도 알려준다
업로드 누르면 끝이다
토렌트 파일 아무거나 업로드 시켜서 붙여봤다
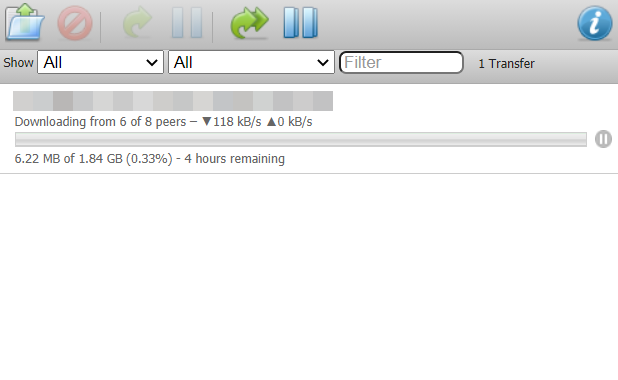
오… 신기하네
그리고 졸라 느려 ㅋㅋ
여러 토렌트를 돌려서 확인해본 건 아니라서
모든 토렌트 속도가 느린 건지 특정 토렌트만 느린 건지는 모른다
장점은 공유기는 항상 켜져있으니 컴퓨터를 꺼도 받아둘 수 있다는 거?
피어 8명 붙어서 그런건지 속도는 300KB 정도 나온다 ㅋㅋ
이미 이런 식으로 간이나스에다가 토렌트 돌려본 사람들 말로는
한 3~4개 정도 붙이면 버벅인다고 하더라 ㅋㅋ
아무래도 공유기에 붙여쓰는 간이나스의 한계지 싶다
나스 대비 속도, 안정성, 온도에서 딸린다
AC68U 공유기의 성능이 이것저것 할 정도로 좋은 게 아니라서
어디까지나 호기심, 재미로 이런 것도 있구나 정도 출처: https://gameseven.tistory.com/614 [컴터의광 연구소 – Nerd.K LAB:티스토리]
