Dash example
https://appsilon.com/dash-vs-shiny/
https://ichi.pro/ko/python-dash-vs-r-shiny-2021-nyeon-ihu-seontaeg-116710519285777
Dash Enterprise App Gallery : https://dash.gallery/Portal/
Dash 대시 보드의 예
New York Uber Rides Dash 대시 보드
https://github.com/plotly/dash-sample-apps/blob/main/apps/dash-uber-rides-demo/app.py
https://github.com/nagyistge/dash-uber-rides-demo
하나의 H3만 보여주는 Dash web

from dash import Dash, html

app = Dash(__name__)

app.layout = html.Div(children=[
    html.H1('Dash App'),
])

if __name__ == '__main__':
    app.run_server(debug=True)
model-view

from dash import Dash, html, dcc

import plotly.express as px
import pandas as pd

# assume you have a "long-form" data frame
# see https://plotly.com/python/px-arguments/ for more options
df = pd.DataFrame({
    "Fruit":  ["Apples", "Oranges", "Bananas",   "Apples",  "Oranges",  "Bananas"],
    "Amount": [       4,         1,         2,          2,          4,          5],
    "City":   [    "SF",      "SF",      "SF", "Montreal", "Montreal", "Montreal"]
})
fig = px.bar(df, x="Fruit", y="Amount",
             color="City", barmode="group")

app = Dash(__name__)
app.layout = html.Div(children=[
    html.H1(children='Hello Dash'),

    html.Div(children='''
        Dash: A web application framework for your data.
    '''),

    dcc.Graph( id='example-graph',
        figure=fig
    )
])
# python app.py
if __name__ == '__main__':
    app.run_server(debug=True)
UI 요소 만들기
UI 구성 요소는 dcc(dash_core_componenets)라이브러리를 통해서 사용

import dash
from dash import dcc
from dash import html

app = dash.Dash(__name__)

app.layout = html.Div(children=[
    html.H1('Heading 1'),
    html.Label('Filter by level:'),
    dcc.Dropdown(
        options=[
            {'label': 'Junior',    'value': 'junior'},
            {'label': 'Mid level', 'value': 'mid'},
            {'label': 'Senior',    'value': 'senior'}
        ],
        value='junior'
    ),
    html.Label('Filter by skills:'),
    dcc.Dropdown(
        options=[
            {'label': 'Python', 'value': 'python'},
            {'label': 'R', 'value': 'r'},
            {'label': 'Machine learning', 'value': 'ml'}
        ],
        value=['python', 'ml'],
        multi=True
    ),
    html.Label('Experience level:'),
    dcc.RadioItems(
        options=[
            {'label': '0-1 years of experience', 'value': '01'},
            {'label': '2-5 years of experience', 'value': '25'},
            {'label': '5+ years of experience', 'value': '5plus'}
        ],
        value='25'
    ),
    html.Label('Additional:'),
    dcc.Checklist(
        options=[
            {'label': 'Married', 'value': 'married'},
            {'label': 'Has kids', 'value': 'haskids'}
        ],
        value=['married']
    ),
    html.Label('Overall impression:'),
    dcc.Slider(
        min=1,
        max=10,
        value=5
    ),
    html.Label('Anything to add?'),
    dcc.Input(type='text')
])

if __name__ == '__main__':
    app.run_server(debug=False)
커스텀 CSS로 UI 스타일링 *
누구도 일반적인 애플리케이션을 좋아하지 않습니다. 앱의 미학은 사용자가 앱에 대해 느끼는 방식과 직접적으로 연결됩니다. 디자인의 발전으로 우리는 멋지게 보이는 상용 앱에 익숙해졌습니다. 그렇다고해서 특히 개발자에게 멋진 앱을 개발하는 것이 쉬운 것은 아닙니다.
@import url('https://fonts.googleapis.com/css2?family=Lato:wght@400;700&display=swap');

* {
    margin: 0;
    padding: 0;
    box-sizing: border-box;
    font-family: 'Lato', sans-serif;
}

.wrapper {
    padding: 1rem 2rem;
    background-color: #f2f2f2;
    height: 100vh;
}

.main-title {
    font-size: 3rem;
}

.paragraph-lead {
    font-size: 1.25rem;
    color: #777777;
}

.card {
    background-color: #ffffff;
    margin-top: 1.5rem;
    padding: 1rem 1.25rem;
    border: 0.1rem solid #c4c4c4;
    border-radius: 0.3rem;
    min-height: 12rem;
}

.card-title {
    margin-bottom: 1rem;
}

.card-text {
    margin-bottom: 3.5rem;
}

.card-button {
    background-color: #0099f9;
    color: #ffffff;
    font-weight: bold;
    border: 0.2rem solid #0099f9;
    border-radius: 0.5rem;
    padding: 1rem 1.5rem;
    cursor: pointer;
    transition: all 0.15s;
}

.card-button:hover {
    background-color: #ffffff;
    color: #0099f9;
}
import dash
from dash import dcc
from dash import html

app = dash.Dash(__name__)
app.layout = html.Div(
    className='wrapper',
    children=[
        html.H3('Dash App',
            className='main-title'),
        html.P('A simple Python dashboard',
            className='paragraph-lead'),
        html.Div(
            className='card',
            children=[
                html.H3('A simple card', className='card-title'),
                html.P('Card text',      className='card-text'),
                html.A('Button',         className='card-button')
            ]
        )
    ])


if __name__ == '__main__':
    app.run_server(debug=True)
그래도 CSS를 통해 스타일을 추가하는 것은 앱의 필수 사항입니다. 이 섹션에서는 동일한 스타일 시트가 둘에서 동일하게 보이는 경우 Dash와 Shiny 모두에 스타일을 추가하는 것이 얼마나 쉬운 지 비교합니다.
누가 Shiny의 기본 스타일링이 단점이 될지 알 수 있습니다. 나중에 Bootstrap 과 같은 사용자 지정 CSS 프레임 워크 를 앱 에 추가하는 것이 얼마나 쉬운 지 비교할 것입니다 .
Dash 애플리케이션 용 CSS 파일은 Shiny 앱용 assets폴더와 www폴더로 이동합니다.
응용 프로그램 파일이있는 루트 디렉터리에 이러한 폴더를 만듭니다.
다음은 Dash와 Shiny 모두를위한 완전한 CSS입니다 main.css.
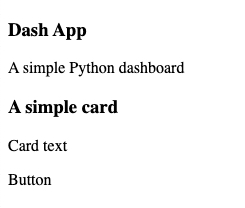
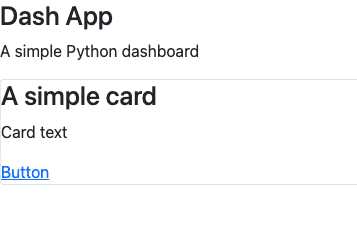
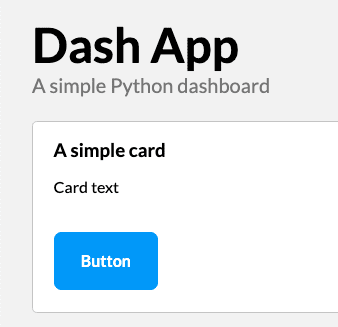
 이미지 7 — 스타일이 지정된 대시 애플리케이션
보시다시피 스타일은 일반 웹 응용 프로그램과 동일하게 작동합니다. Dash는 Shiny처럼 기본 스타일을 추가하지 않았기 때문입니다.
부트 스트랩으로 UI 스타일링
CSS 프레임 워크에 대해 살펴 보겠습니다. 부트 스트랩은 수년 동안 가장 인기있는 프레임 워크 중 하나 였으므로 자연스럽게 앱에 포함하는 것이 좋습니다. 새로운 디자인 요소를 도입하고 앱에 더 신선한 모습을 제공 할 수있는 좋은 방법입니다.
여러분의 앱은 여전히 ”기본”처럼 보일 것입니다. 대부분은 부트 스트랩이 너무 오랫동안 출시되어 “표준”모양과 연결하기 때문입니다.
웹 디자인 / 개발에 단기간 이상 종사 한 사람이라면 누구나 이것이 사실임을 압니다.
Dash에 Bootstrap을 포함하는 것은 쉽습니다. dash_bootstrap_components라이브러리 를 설치하기 만하면 됩니다. 아래 코드는 Dash에서 탐색 모음과 점보트론을 만드는 방법을 보여줍니다.
import dash
import dash_html_components as html
import dash_bootstrap_components as dbc

app = dash.Dash(
    external_stylesheets=[dbc.themes.BOOTSTRAP]
)
navbar = dbc.NavbarSimple(
    children=[
        dbc.NavItem(dbc.NavLink('About', href='#')),
        dbc.NavItem(dbc.NavLink('Products', href='#')),
        dbc.DropdownMenu(
            children=[
                dbc.DropdownMenuItem('More pages', header=True),
                dbc.DropdownMenuItem('Page 2', href='#'),
                dbc.DropdownMenuItem('Page 3', href='#'),
            ],
            nav=True,
            in_navbar=True,
            label='More',
        ),
    ],
    brand='Bootstrap NavBar',
    brand_href='#',
    color='#0099f9',
    dark=True,
)

jumbotron = dbc.Jumbotron([
    html.H1('Welcome', className='display-3'),
    html.P('This is a sample jumbotron', className='lead'),
    html.Hr(className='my-2'),
    html.P('Additional dummy text'),
    html.P(dbc.Button('Learn more', color='primary'), className='lead'),
])

app.layout = html.Div([
    navbar,
    jumbotron
])

if __name__ == '__main__':
    app.run_server(debug=True)
 이미지 9 — 대시 및 부트 스트랩
Reactive
대시 보드는 일반 보고서처럼 보이고 작동해서는 안됩니다. 대화 형이어야합니다. 사용자는 표시되는 내용을 쉽게 변경할 수없고 개별 데이터 포인트와 상호 작용할 수도 없다면 대시 보드를 좋아하지 않을 것입니다.
그것이 반응 (또는 콜백)이 들어오는 곳입니다.
여기에서 옵션은 끝이 없습니다. 모든 구성 요소를 단일 입력 변경으로 업데이트하고, 선택한 구성 요소 만 업데이트하고, 버튼을 누를 때까지 업데이트를 지연하는 등의 작업을 수행 할 수 있습니다. 기본 사항을 고수하고 입력이 변경되면 업데이트를 수행합니다.
이 예에서는 단일 텍스트 입력과 두 개의 드롭 다운 메뉴가 있습니다. 해당 값은 시각화의 모양을 결정합니다. 텍스트 입력은 제목을 변경하는 데 사용되며 두 개의 드롭 다운은 X 및 Y 축에 표시되는 속성에 사용됩니다.
Python과 Dash부터 시작하겠습니다. 코드는 다음과 같습니다.
 이미지 11 — Python 및 Dash를 사용한 반응성 데모
단순한 대시 보드이지만 상당한 양의 코드가 필요합니다. 그럼에도 불구하고 코드는 읽고 이해하기 쉽습니다. Dash는 app.callback데코레이터 패턴을 사용 하여 반응성을 처리합니다. 단일 콜백에서 많은 구성 요소를 업데이트하고 필요한만큼 많은 구성 요소에서 값을 가져올 수 있습니다.
또한 Dash에서 사용자 정의 구성 요소를 생성하려면 광범위한 React.js 지식이 필요 하며 이는 큰 장애물입니다. 대시는 중간 반응 변수도 부족합니다. 이를 사용하려면 숨겨진 div를 만들어 계산을 저장하고 재사용해야합니다.
